
A chat widget is the bubble visitors click to start a conversation on your website. This guide takes you from an empty account to a working widget: create it, brand it, connect where your team answers, and install it on your site. Total time is about ten minutes.
Step 1: Create the Widget
Open Chat Widgets
Log in and click Chat Widgets in the left sidebar. New accounts see a guided setup; existing accounts click New widget.
Name It
Use the website or team it serves - "Main Site", "Support", "Pricing Pages". The name is internal; visitors see the header text you choose next.
Step 2: Configure the Settings Tab
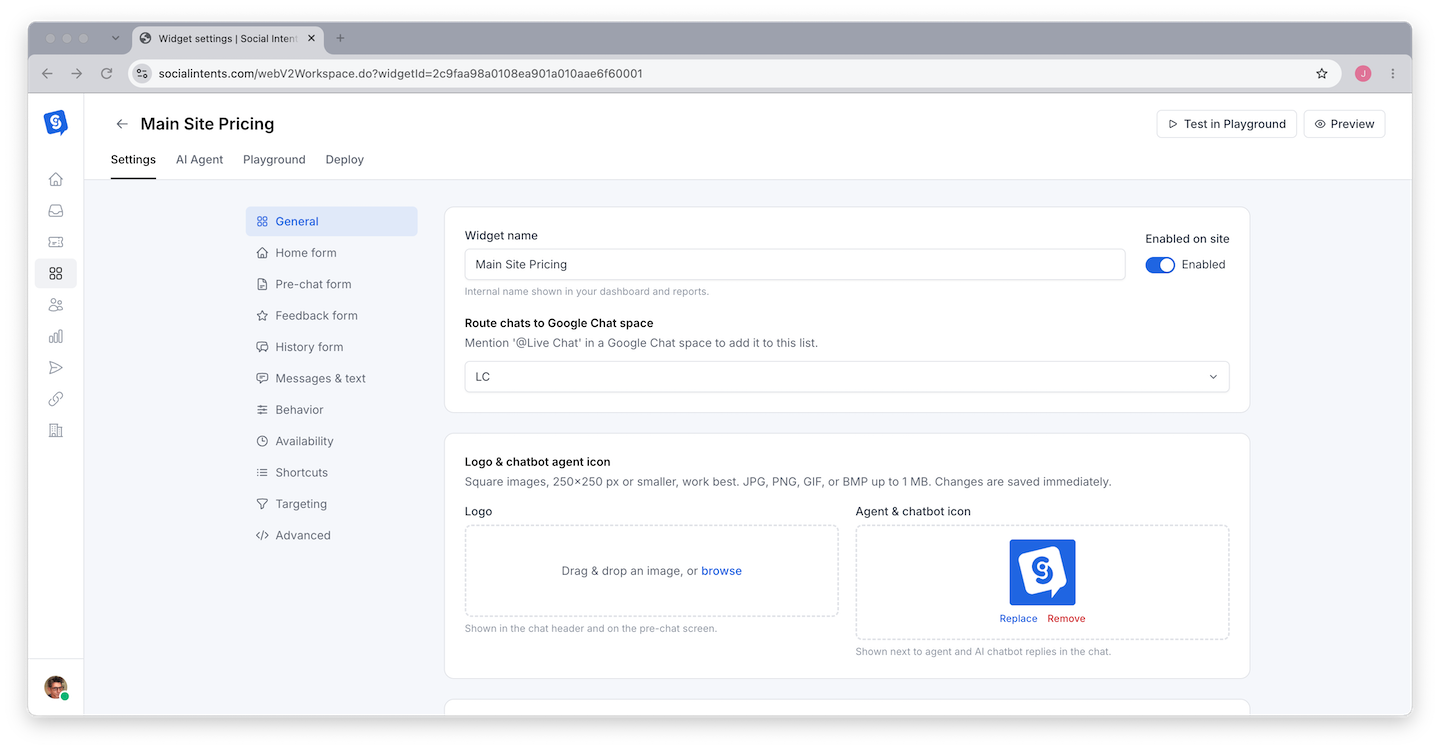
Selecting a widget opens its workspace with four tabs: Settings, AI Agent, Playground, and Deploy. Start in Settings:
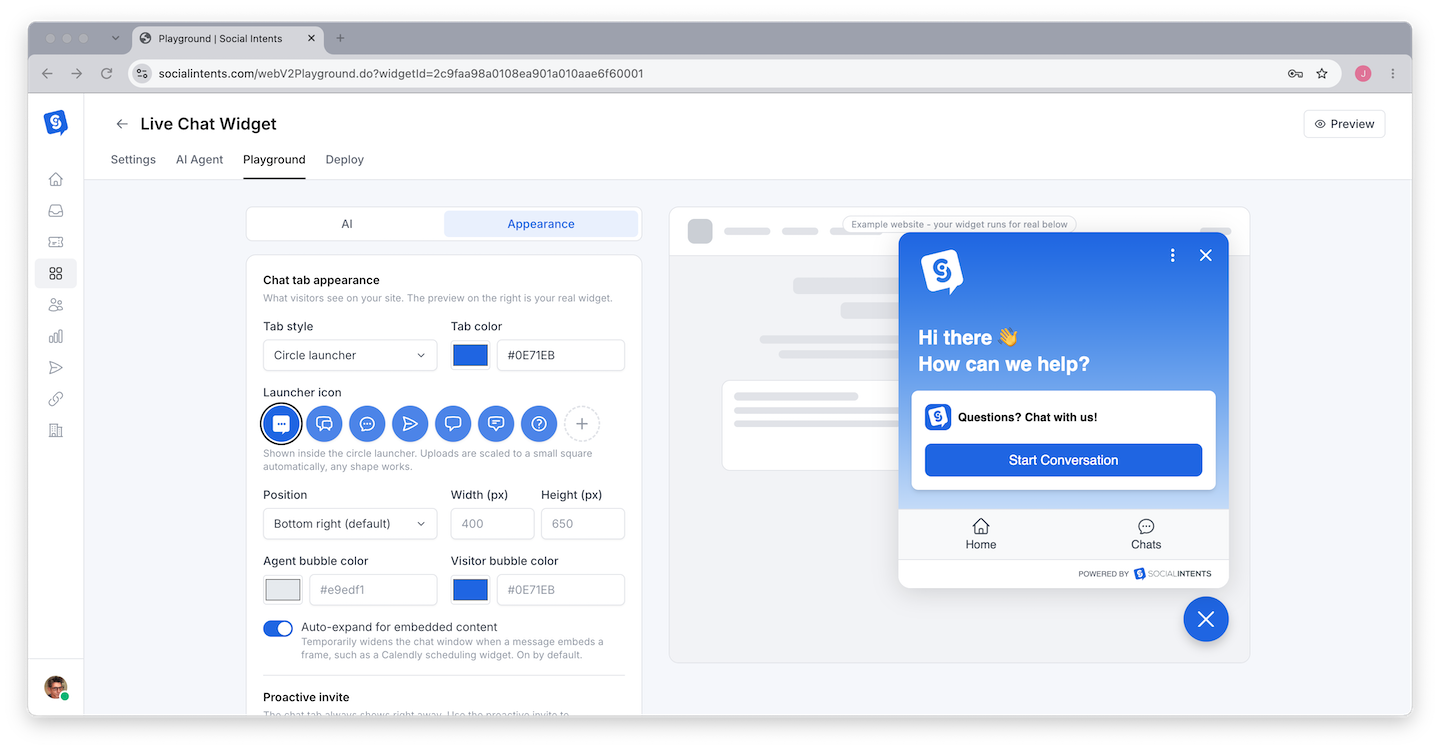
- Appearance - Brand color, widget position (bottom-right or bottom-left), logo, and agent icon. Details in Customizing Chat Widget Appearance.
- Text & greeting - The header title, welcome message, and offline message visitors see.
- Pre-chat form - Ask for name, email, or custom fields before the chat starts. See Pre-Chat Forms and Custom Fields.
- Targeting & schedule - Show the widget only on certain pages, or only during business hours. See Online Schedule vs Manual Status.
Step 3: Decide Where Chats Go
Chats always appear in your Inbox. To answer from Microsoft Teams, Slack, Google Chat, Zoom, or Webex instead, connect that platform under Integrations in the sidebar. Not sure which to pick? Read Choosing Your Agent Integration.
Want AI to answer first? Open the AI Agent tab and enable a chatbot - the full walkthrough is in Build Your First AI Chatbot. You can skip this and add AI later; nothing about the install changes.
Step 4: Install the Widget
Open the Deploy Tab
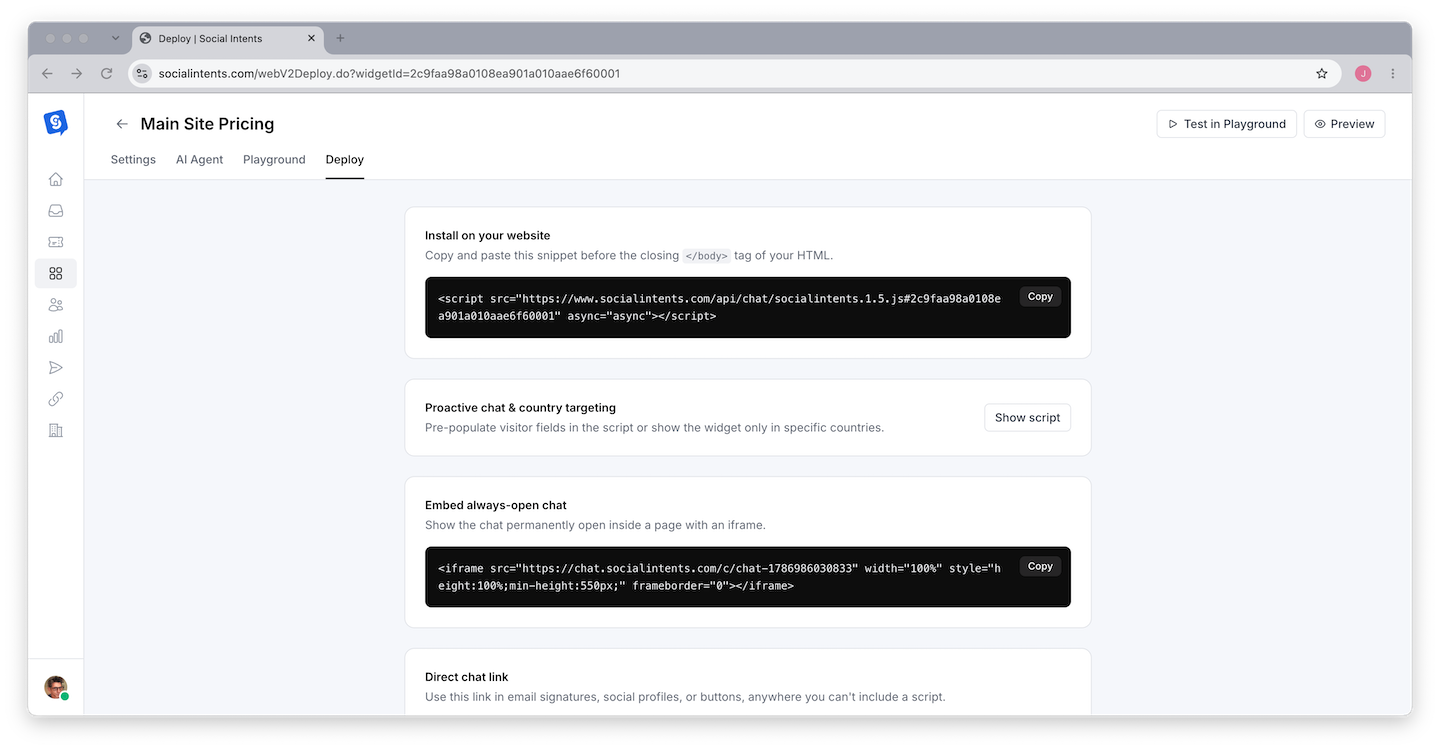
In the widget workspace, click Deploy. Copy the JavaScript snippet.
Paste Before the Closing Body Tag
Add the snippet just before </body> on every page where chat should appear. On most platforms you paste it once in a shared layout, footer, or theme file.
Platform guides with exact click paths: WordPress, Shopify, Wix, Webflow, Squarespace, Google Tag Manager, and any other platform. The general process is covered in Installing the Chat Widget on Your Website.
Step 5: Verify It Works
- Open your website in a private/incognito window - the chat bubble should appear within a few seconds.
- Start a chat as a visitor and confirm it arrives in your Inbox (and your Teams/Slack channel if connected).
- Reply from the agent side and confirm the visitor sees it.
For a deeper test pass - including AI answers and escalation - see Previewing and Testing Your Chat.
Troubleshooting
The bubble does not appear
Confirm the snippet is on the page (view source and search for socialintents), then check the Settings tab for page targeting or schedule rules that might hide it. Caching plugins and CDNs may need a purge after adding the code.
Chats are not reaching my team
Make sure at least one agent is online, or that your platform integration is connected to the right channel. See Troubleshooting Missed Chats and Notifications.
Frequently Asked Questions
Can I put the same widget on multiple websites?
Yes - the same snippet works on any number of domains. Use separate widgets when you want different branding, teams, or routing per site. See When to Use Multiple Chat Widgets.
Will the widget slow down my site?
No. The snippet loads asynchronously after your page renders, so it does not block page load or hurt Core Web Vitals.
Do I need to know how to code?
No. Copying one snippet is the only technical step, and platform plugins remove even that on WordPress and Shopify.