
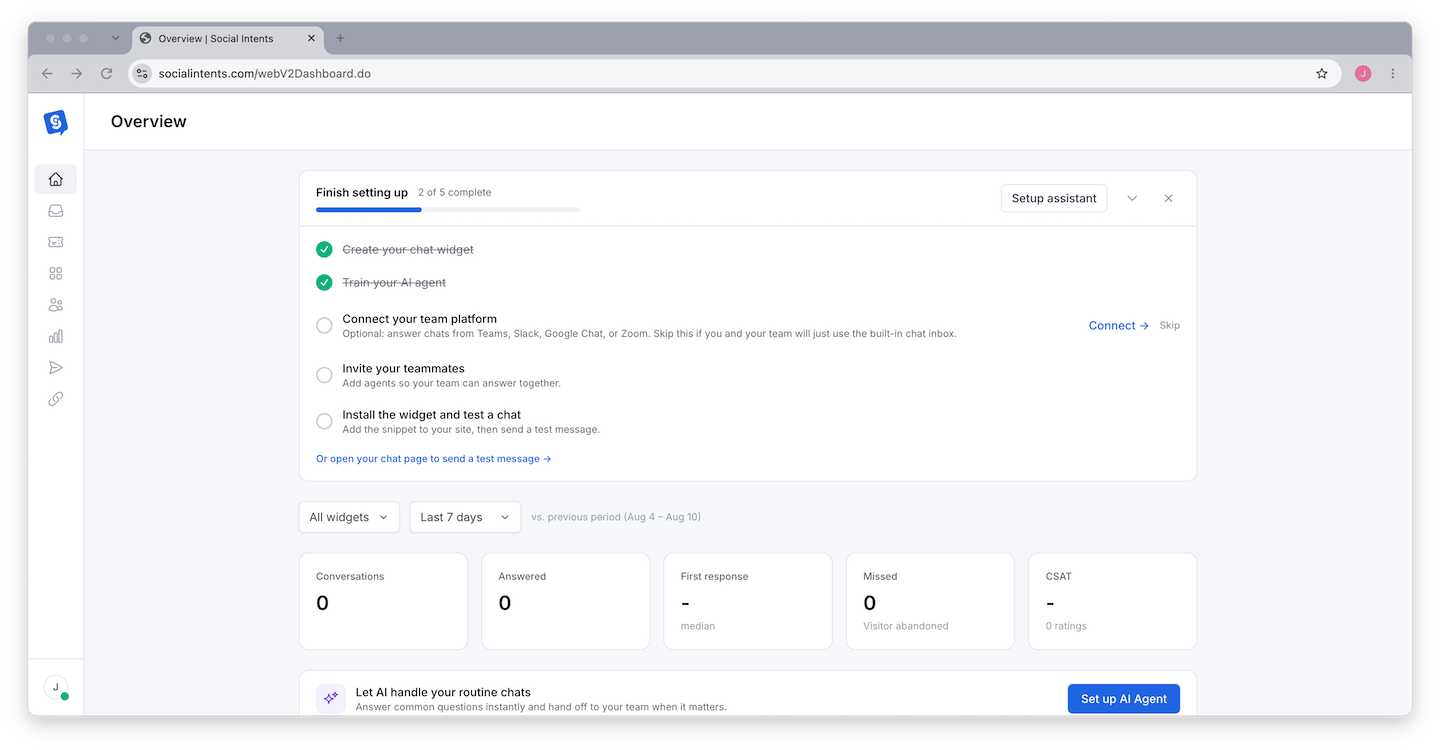
This checklist mirrors the getting-started list inside the product and adds the best practices we see separate great launches from quiet ones. Work top to bottom; each item links to the detailed guide. A focused team gets through everything in under an hour.
Launch Essentials
1. Create and brand your widget
Set your brand color, logo, header text, and greeting in the widget's Settings tab. A greeting that asks a question ("What can we help you build today?") starts more conversations than a generic "Hi there". Guide: Set Up Your First Chat Widget.
2. Connect your agent platform
Route chats to Microsoft Teams, Slack, Google Chat, Zoom, or Webex - or run everything from the web Inbox.
3. Install the chat code
Copy the snippet from the Deploy tab into your site or tag manager. Platform guides: WordPress, Shopify, Wix, Webflow, Google Tag Manager.
4. Add your team
Invite agents under Settings → Team and set roles (Admin, Manager, Agent). Decide who covers which hours before chats start arriving. Guide: Adding and Managing Team Members.
5. Test end to end
Run the nine-point checklist in Previewing and Testing Your Chat: widget renders, chat reaches the team, replies flow both ways, offline behavior works.
Strongly Recommended Before Launch
6. Set your schedule and offline flow
Configure business hours so the widget switches to an offline lead form when nobody is available - captured leads beat missed chats. Guides: Online Schedule vs Manual Status and What Happens When Everyone Is Offline.
7. Turn on notifications everywhere agents work
Platform notifications, browser notifications, and mobile alerts - redundancy is the point. The #1 cause of bad chat experiences is a missed notification. Guide: Notifications and Mobile Alerts.
8. Add a pre-chat form
Collect name and email up front so every conversation becomes a contact you can follow up with - especially ones that arrive after hours. Guide: Pre-Chat Forms and Custom Fields.
9. Create canned responses
Write shortcuts for your ten most common answers - shipping times, pricing, refund policy - so replies are fast and consistent. Guide: Canned Responses and Quick Replies.
Level Up in Week One
10. Train an AI chatbot
Point the bot at your website and docs in the AI Agent tab, tune it in the Playground, and let it handle the repetitive half of your volume. Guides: Build Your First AI Chatbot and Training Your Chatbot on Your Content.
11. Configure escalation to humans
Make sure the bot hands off gracefully when a visitor asks for a person - and that the handoff notifies the right channel. Guide: Setting Up Escalation to Human Agents.
12. Review your first conversations
Read every transcript from week one in Analyze. You will find missing knowledge for the bot, new canned response candidates, and website copy that confuses people. Guide: Understanding Your Reports Dashboard.
Best Practices That Compound
- Respond in under a minute. Chat is an immediacy channel - response time is the metric to obsess over early.
- Sound like a person. Short sentences, first names, no ticket-speak. Visitors chose chat to avoid formality.
- Close the loop. End chats by asking "Anything else I can help with?" and follow up by email on anything you promised - contacts and transcripts make this easy.
- Review weekly. Ten minutes with Analyze each Friday - volume, missed chats, satisfaction, bot escalation rate - keeps the whole system improving.
Frequently Asked Questions
What is the minimum viable launch?
Items 1, 2, 3, and 5: a branded widget, a connected team channel, installed code, and one successful test chat. Everything else improves an already-working setup.
Should I launch with AI or humans first?
If your team can cover business hours, launch human-first and add AI in week one using real transcripts as training guidance. If coverage is thin, launch the bot first with a strong offline lead form as backup.
Where is the in-app checklist?
New accounts see it on the dashboard until completed. It tracks the same essentials as this page.